save whites in watercolor
Saving whites in watercolor is a challenge, but also a journey in exploring different tools and techniques to create the whitest whites, while also being free in your watercolor painting style. I want to share some of the ways that I work to save and create my white, as well as tips that other artists use.
You want to be able to have whites as highlights and to allow your pictures to breathe. On the other hand, I want to use full and loose brush strokes to better enjoy the process and create interesting marks. This balance between both can be interesting in watercolor. Allowing the work to evolving on its own as well as restraining certain aspects of the work as you’d like to be.
There are a few ways that artists save whites. I have tried many and spent money on supplies that were recommended but did not work for me. Rather than you wasting resources or buying different white pens, I’m sharing my tools and techniques that have worked for me.
Here are the tools that I use for getting whites white in watercolor, and when is the best time they work.
Painting around the white
The best way to leave white is to paint around it on the page. This takes pre-planning and an understanding of where the picture is going. Check out @felixscheinberger on Instagram to see a master at this. For us mere mortals, this can be challenging, but gets better with practice.
In the picture below, I left the white of the page to show where the light was hitting this black tea kettle. When I painted it, I used turquoise for a mid-tone value, and then Payne’s grey for the darker value. Given the size of the picture, it was easy enough to paint around the highlights and leave them white. I admire how Felix Scheinberger achieves this. He is a master!

Using masking fluid to keep the whites
Masking fluid is a gummy substance, similar to rubber cement, that you can paint on the page first, let dry, paint over, and then remove to reveal the white paper. It works well to paint a background around white objects. Use a cheap, stiff brush, and put dish soap on it to protect it (otherwise it will gum it up). Dip the brush into the masking fluid and draw your object. Immediately rinse the brush in water. This set has a stick to put it down so you don’t ruin brushes. This bottle is just the masking fluid.
When the fluid dries (it’s probably dry when there is no sheen on the masking fluid, but I usually let it dry all day or overnight), paint away. Let your paint dry completely. Then remove the masking fluid gently with a clean finger or the square included in the first set above. Remove only in gentle, downward strokes to protect your paper.
On this card, to create shadows between the petals, I used a small damp brush to wet the paint in the background watercolor and “drag” it towards the center of the flowers after removing the masking fluid.

Wax resist
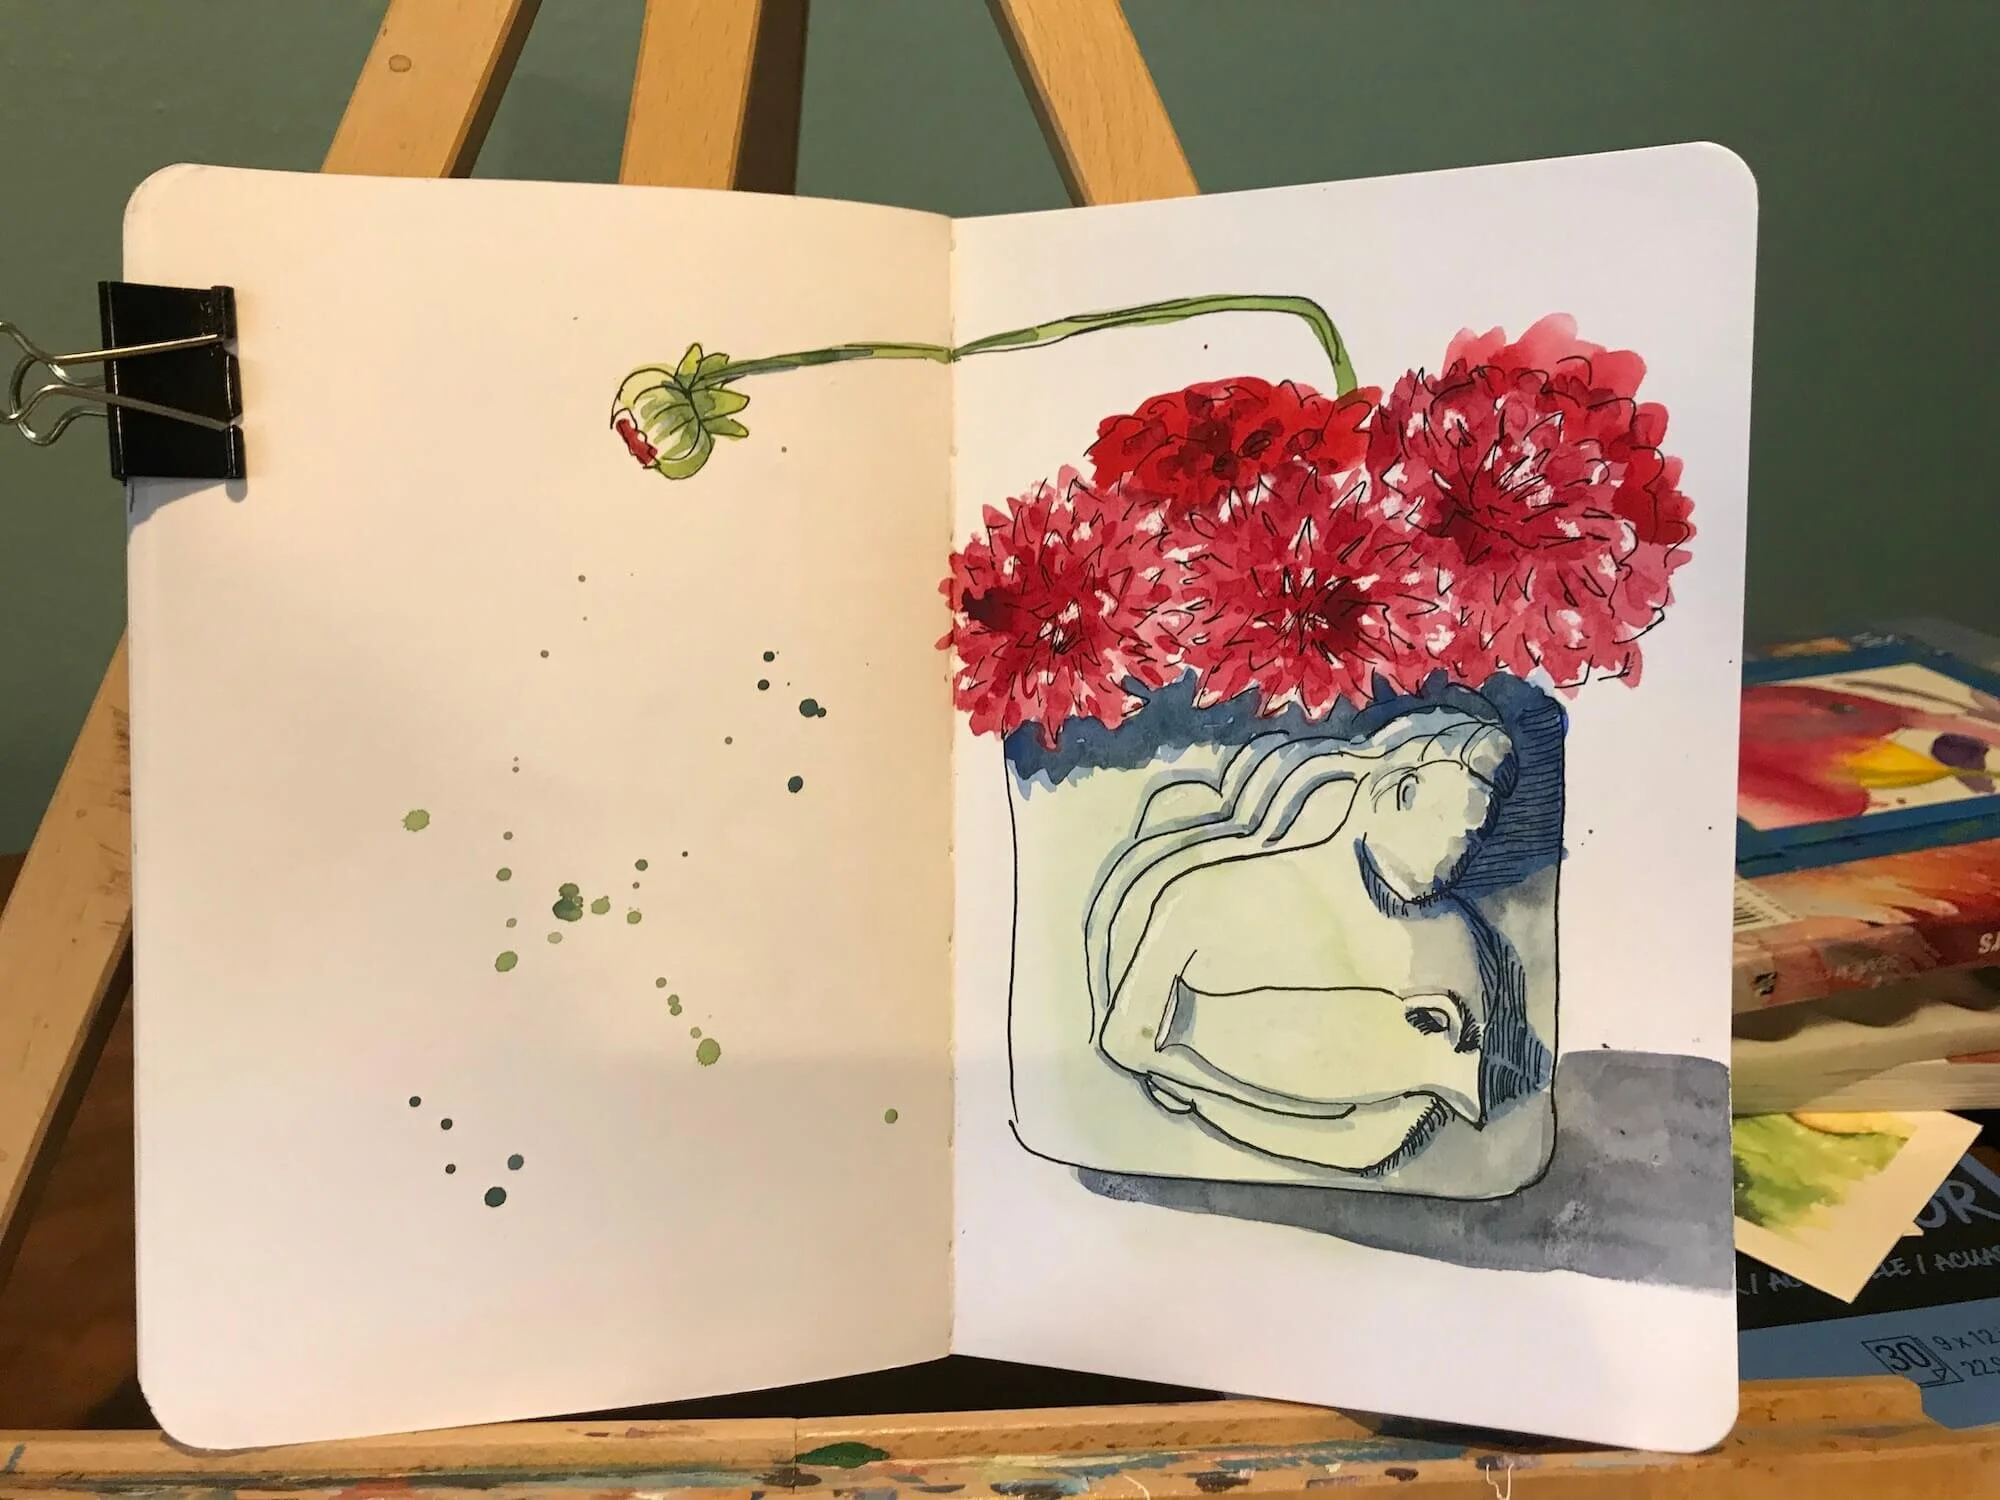
If you have a drawing and know where you want your highlights to go, using a white birthday candle can be a great way to save whites. Watercolor will not adhere to the wax, so the highlights remain. The following picture is a picture done from my neighbor’s yellow-pointed dahlias. After putting down a light drawing, I achieved the highlights using a white candle to draw triangular marks on some of the petal tips, and painting the flowers over the top.
Note: @lapinbarcelona says if something doesn’t fit in your picture, just turn it! In my original subject, the flower bud went straight up. I could have left it out, but I liked the hint of color and the way the green parts curled in on that sweet little bud. Since it wouldn’t fit on my page as-is, I lopped it over to the left. I loved the end results and how it better helps fill up the opened page.
Bleed Proof White and White Gouache
I often use white gouache to add a touch of white. Many watercolor sets come with a Chinese white, which is white gouache. You can order it here.
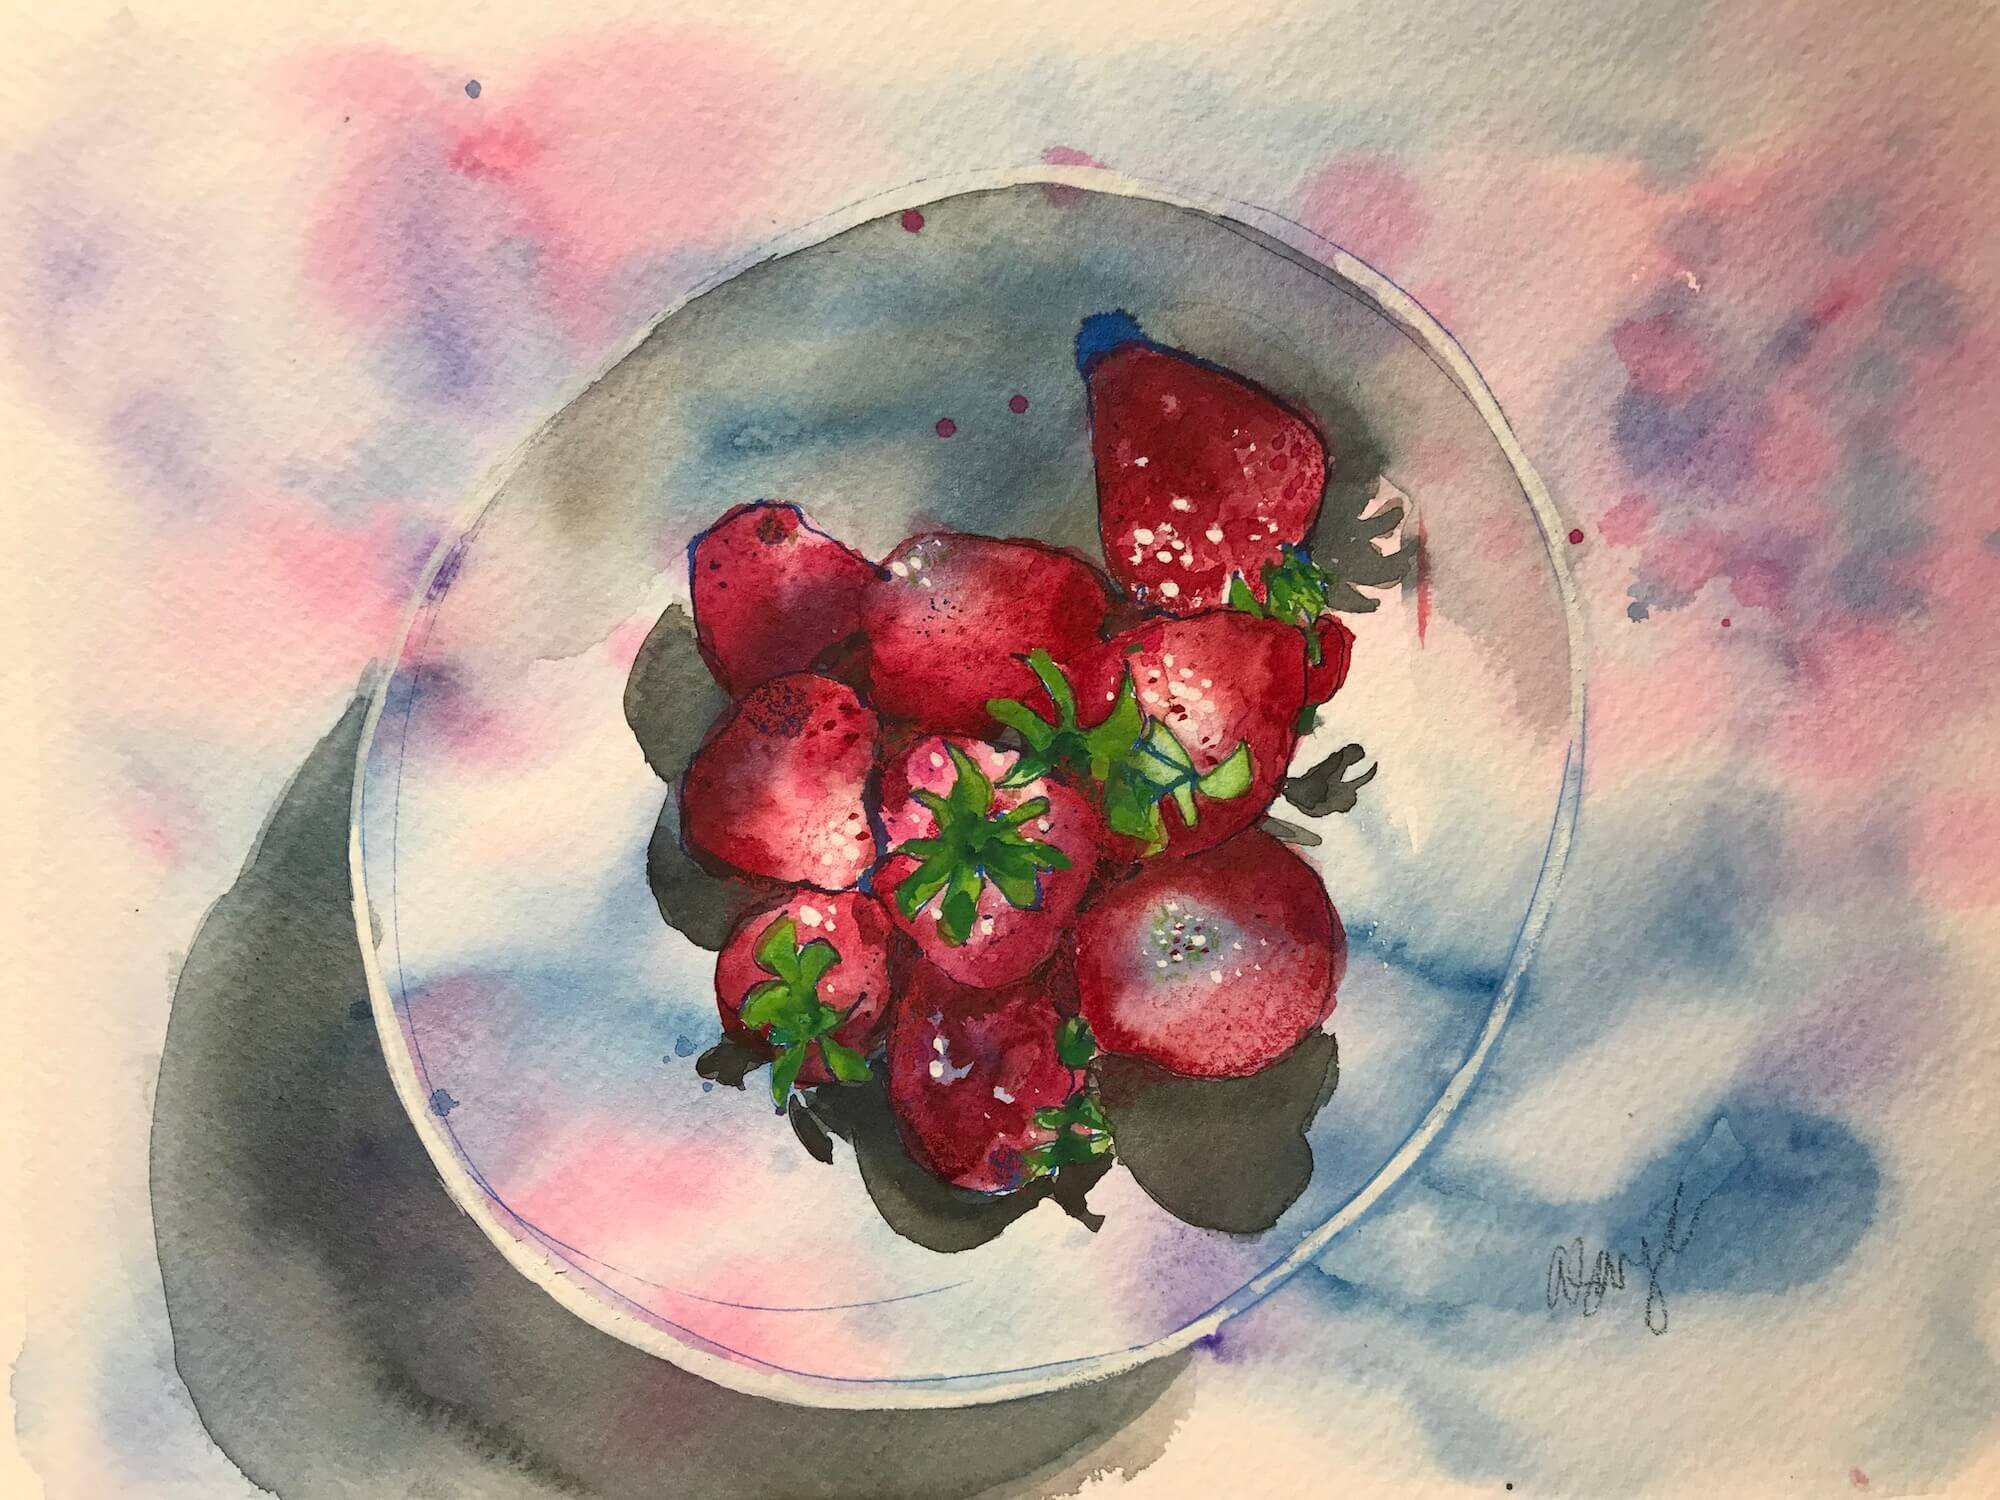
My new favorite is Dr. Ph Martin’s Bleed Proof White. It allows you to add crisp highlights after the picture is complete without planning or fussing. White gouache is slightly less thick and works in a similar way. Using a small brush, I dotted highlights onto these berries to bring them alive.

White pens
I’ve tried so many white pens, white markers, and white ink recommended by artists. I’ve never been able to achieve a bright white. Markers are not bad at lightening, but I have not been able to achieve the bright white of the paper. If you have any tips for using these materials, I’d love you to share them in the comments, so we can all learn more about artmaking.
The Sakura Gelly Roll white pens are good at drawing white lines for highlights to smooth paper. Check out Ohn Mar Win for a master at this. She also magically paints and draws around the white of the page.
*This post contains affiliate links